
Direct Mail is used in conjunction with the Data tool to send direct mail campaigns to specifically targeted households. "Add to Carousel" is only visible if you are a Toolkit Admin User.
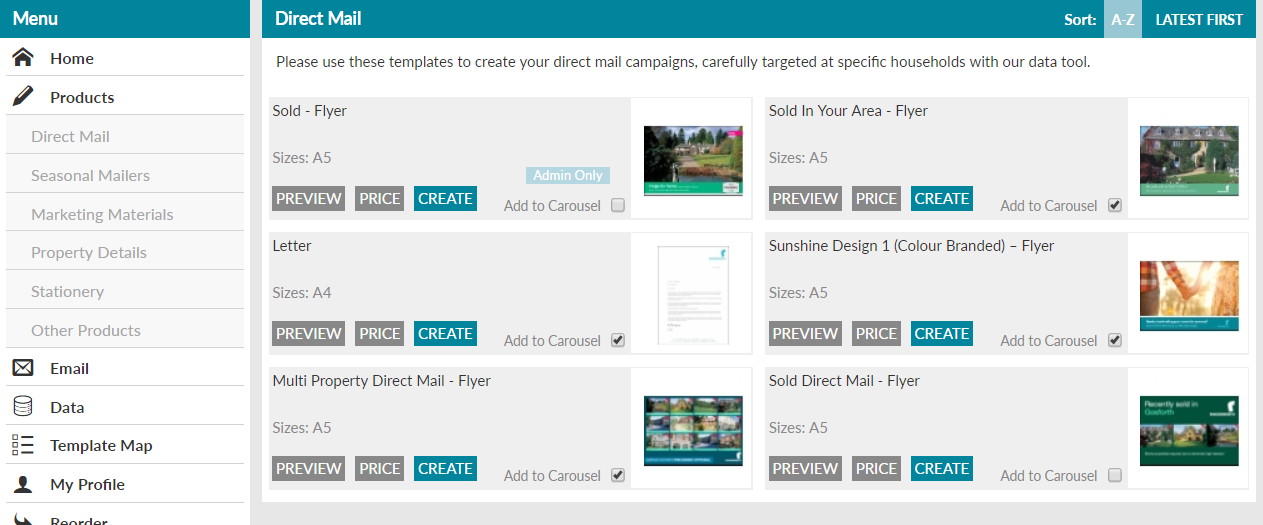
From the Direct Mail screen, looking at the Sold - Flyer, you can Preview, check the prices and start Creating the campaign.
Clicking on Create will take you to the below page:

From here you can create a new reference for your work, or use one of your previously created references by clicking on the list below (or using the search option to the right). Here we have created a new reference.
Press Create.
That will take you to the following page:

- The Upload Images tab will allow you to upload the images on the page 1 and page 2 of the flyer.
- Page 1 Image 1 Flash Text Options allows you to choose what will appear on the top right hand side of the flyer. Sold, Sold STC, Sale Agreed, etc. You can even chose to remove the flash altogether by clicking Not required from that drop down.
- From here you can change the image on Page 1. Clicking Open Image Library will take you to the below screen.
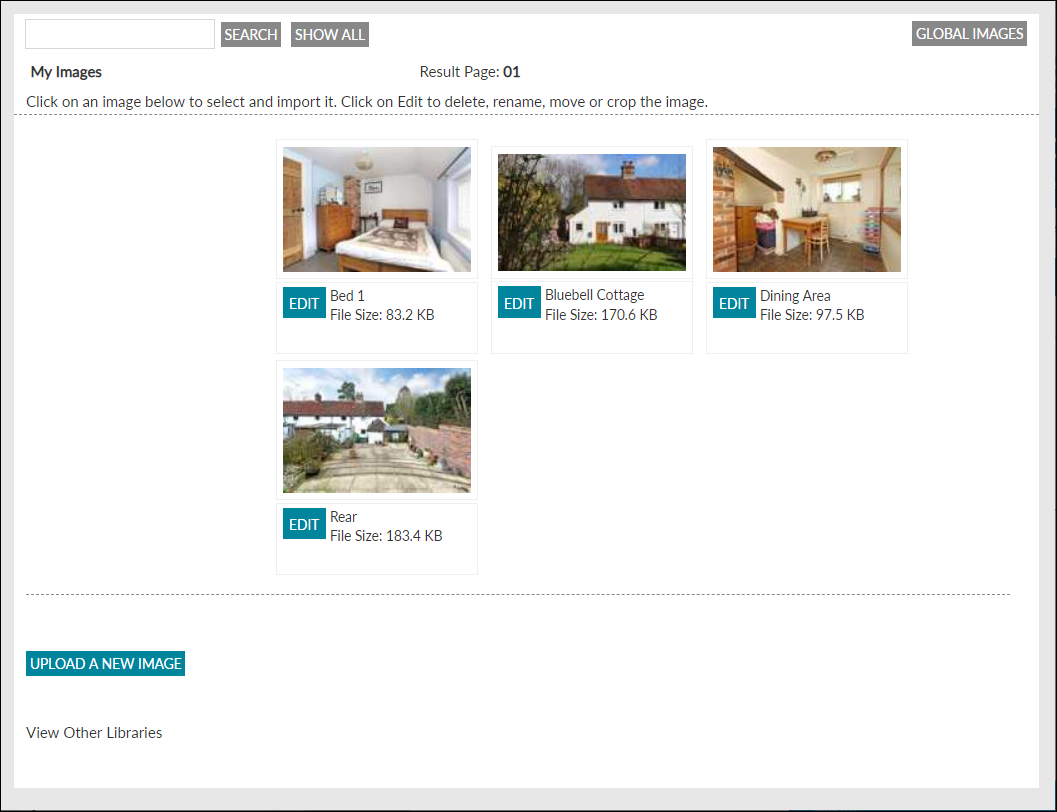 You can search, show all, view Global Images, Upload New Image and View other Libraries from here or click onto a photo to Edit (this will allow you to delete, rename, view full image, and crop). Clicking on am image will add it to the flyer. You can then close this page.
 - This part allows you to configure the second page of the flyer with the same options, plus allowing you to chose how many images show on the second page. Use the page navigation at the bottom to preview the second page.
The Second Stage is Insert Text:
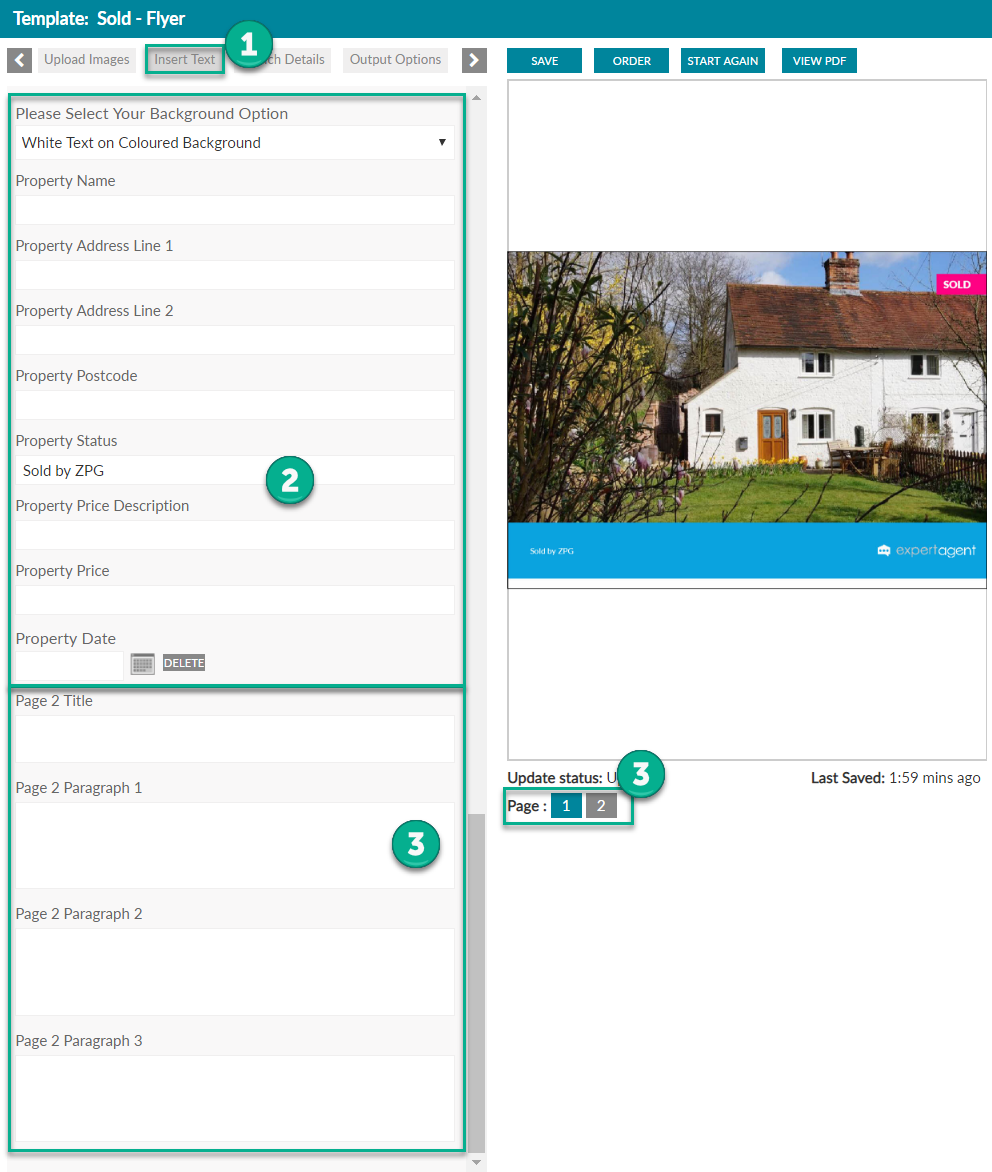
- Insert Text allows you to configure the text on both the first and second pages of your Flyer.
- Choose your Background Option and fill in the details of the Property that will show on page 1.
- Fill in the details for Page 2. Remember you can navigate to page 2 (so that it shows in the right hand preview pane) by clicking here

- The next step is Branch Details.
- These pull from your branch set up but you can change them here. They will appear on the back page of the Flyer. And you can choose to include your Twitter and Facebook information as well.

- The final tab of the Sold Flyer is Output Options.
- There are three output options here. Back to Branch options will return the flyers to you to send back. The Direct Mail option will send out the flyers directly to your mailing list recipients.
Throughout this process, it will autosave for you but you do have the options to Save, Order, Start Again or View PDF from the top right

At this point, once you are happy, you can click Order.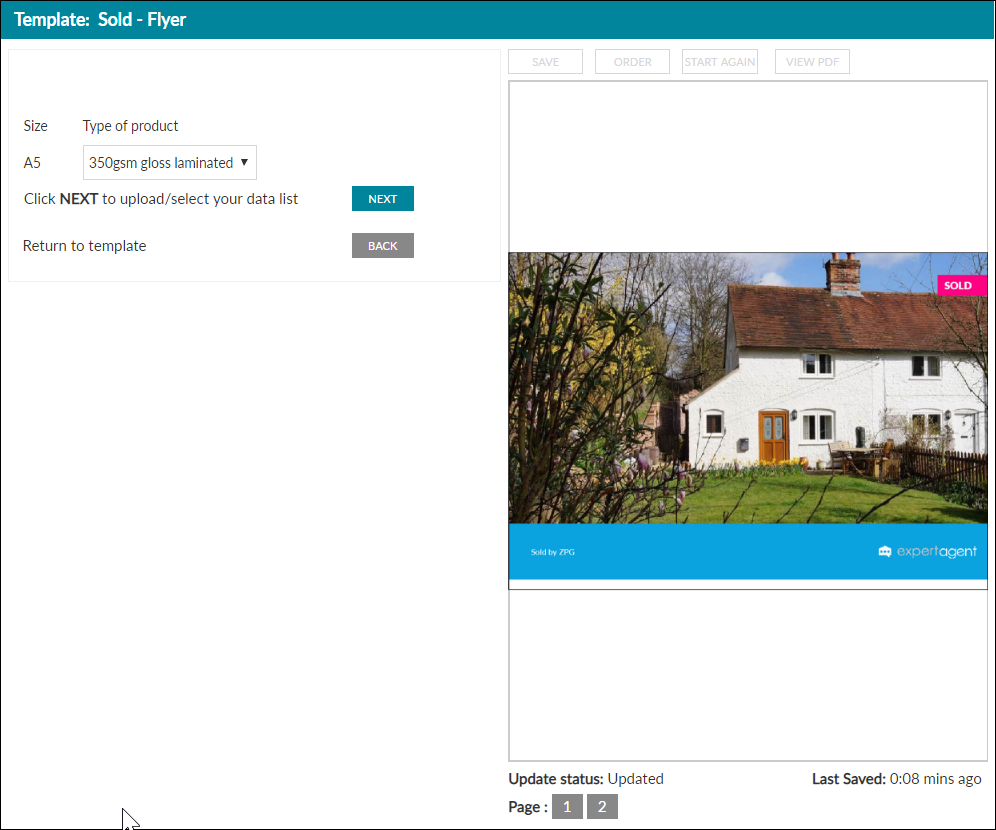
You can choose the paper finish from here and click NEXT to upload/select your data list. Once you've chosen you will be taken to the data section of the campaign.
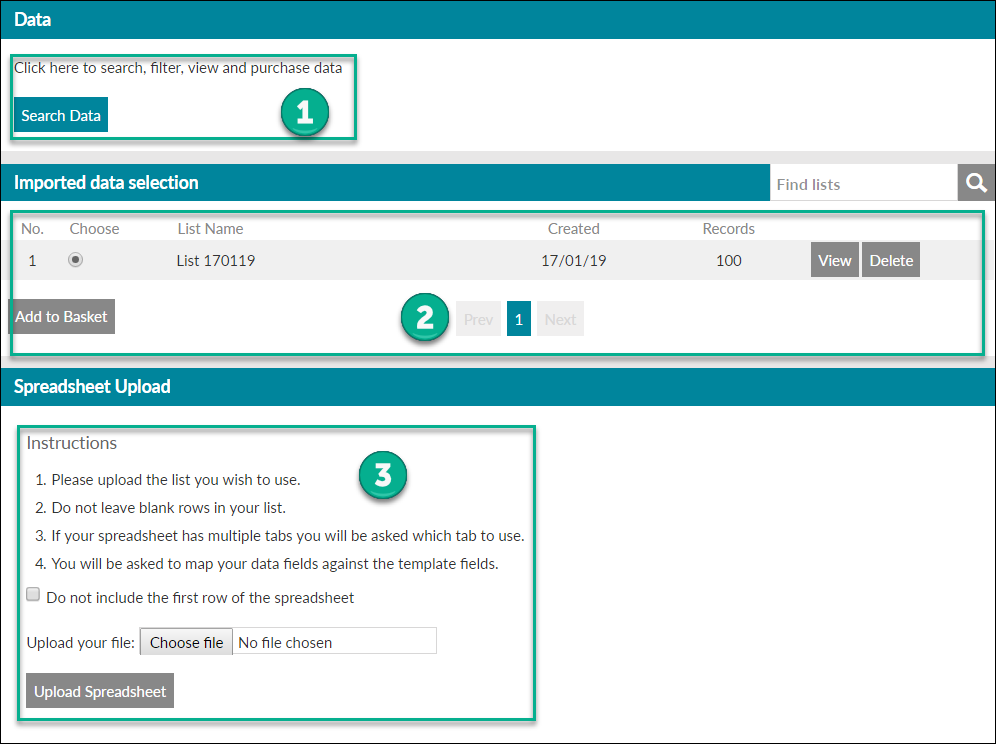
- You can create a new data list from here by clicking Search Data. This will also allow you to search from existing lists. See Data for instructions on how to do this.
- From this section you will see your imported data selection. This will be once you have completed step 1. You can view or delete from here or click "Add to Basket".
- You may also wish to upload your own .csv, .xls or .xlsx spreadsheet.
Here we have used an existing data list we had and clicking "Add To Basket".
Comments
0 comments
Please sign in to leave a comment.